Not-so-maiden voyage

Comment

Not-so-maiden voyage

The first leg of the trip. (Sorry for the yellow on yellow, but no control over route color)

The first leg of the trip. (Sorry for the yellow on yellow, but no control over route color)

Well...After the first trip ended after not even an hour, the second try to get the little old lady to Redwood City on Thu March 24th, 2016, was far more successful. This time my friend John joined me for what turned out to be a two-day trip. The first 32 miles (of the total 93 (!) Mile trip got me from Stockton to Pittsburg, all motoring since no-wind (which was fine in this case, since any wind would have been straight ahead and in-our-face).

The weather was find and balmy as you can expect in spring in California. The engine was turning over nicely and we're making over 7 knots (almost 13 km/hr) but the first hour or so I was constantly checking the bilge area to ensure we were not making water like the last time we set out. And we didn't...The San Joaquin river and the shipping channel was pretty quite still since it being early in the season etc. and most of the traffic on the river was some fishermen so easy peasy, japaneesey.

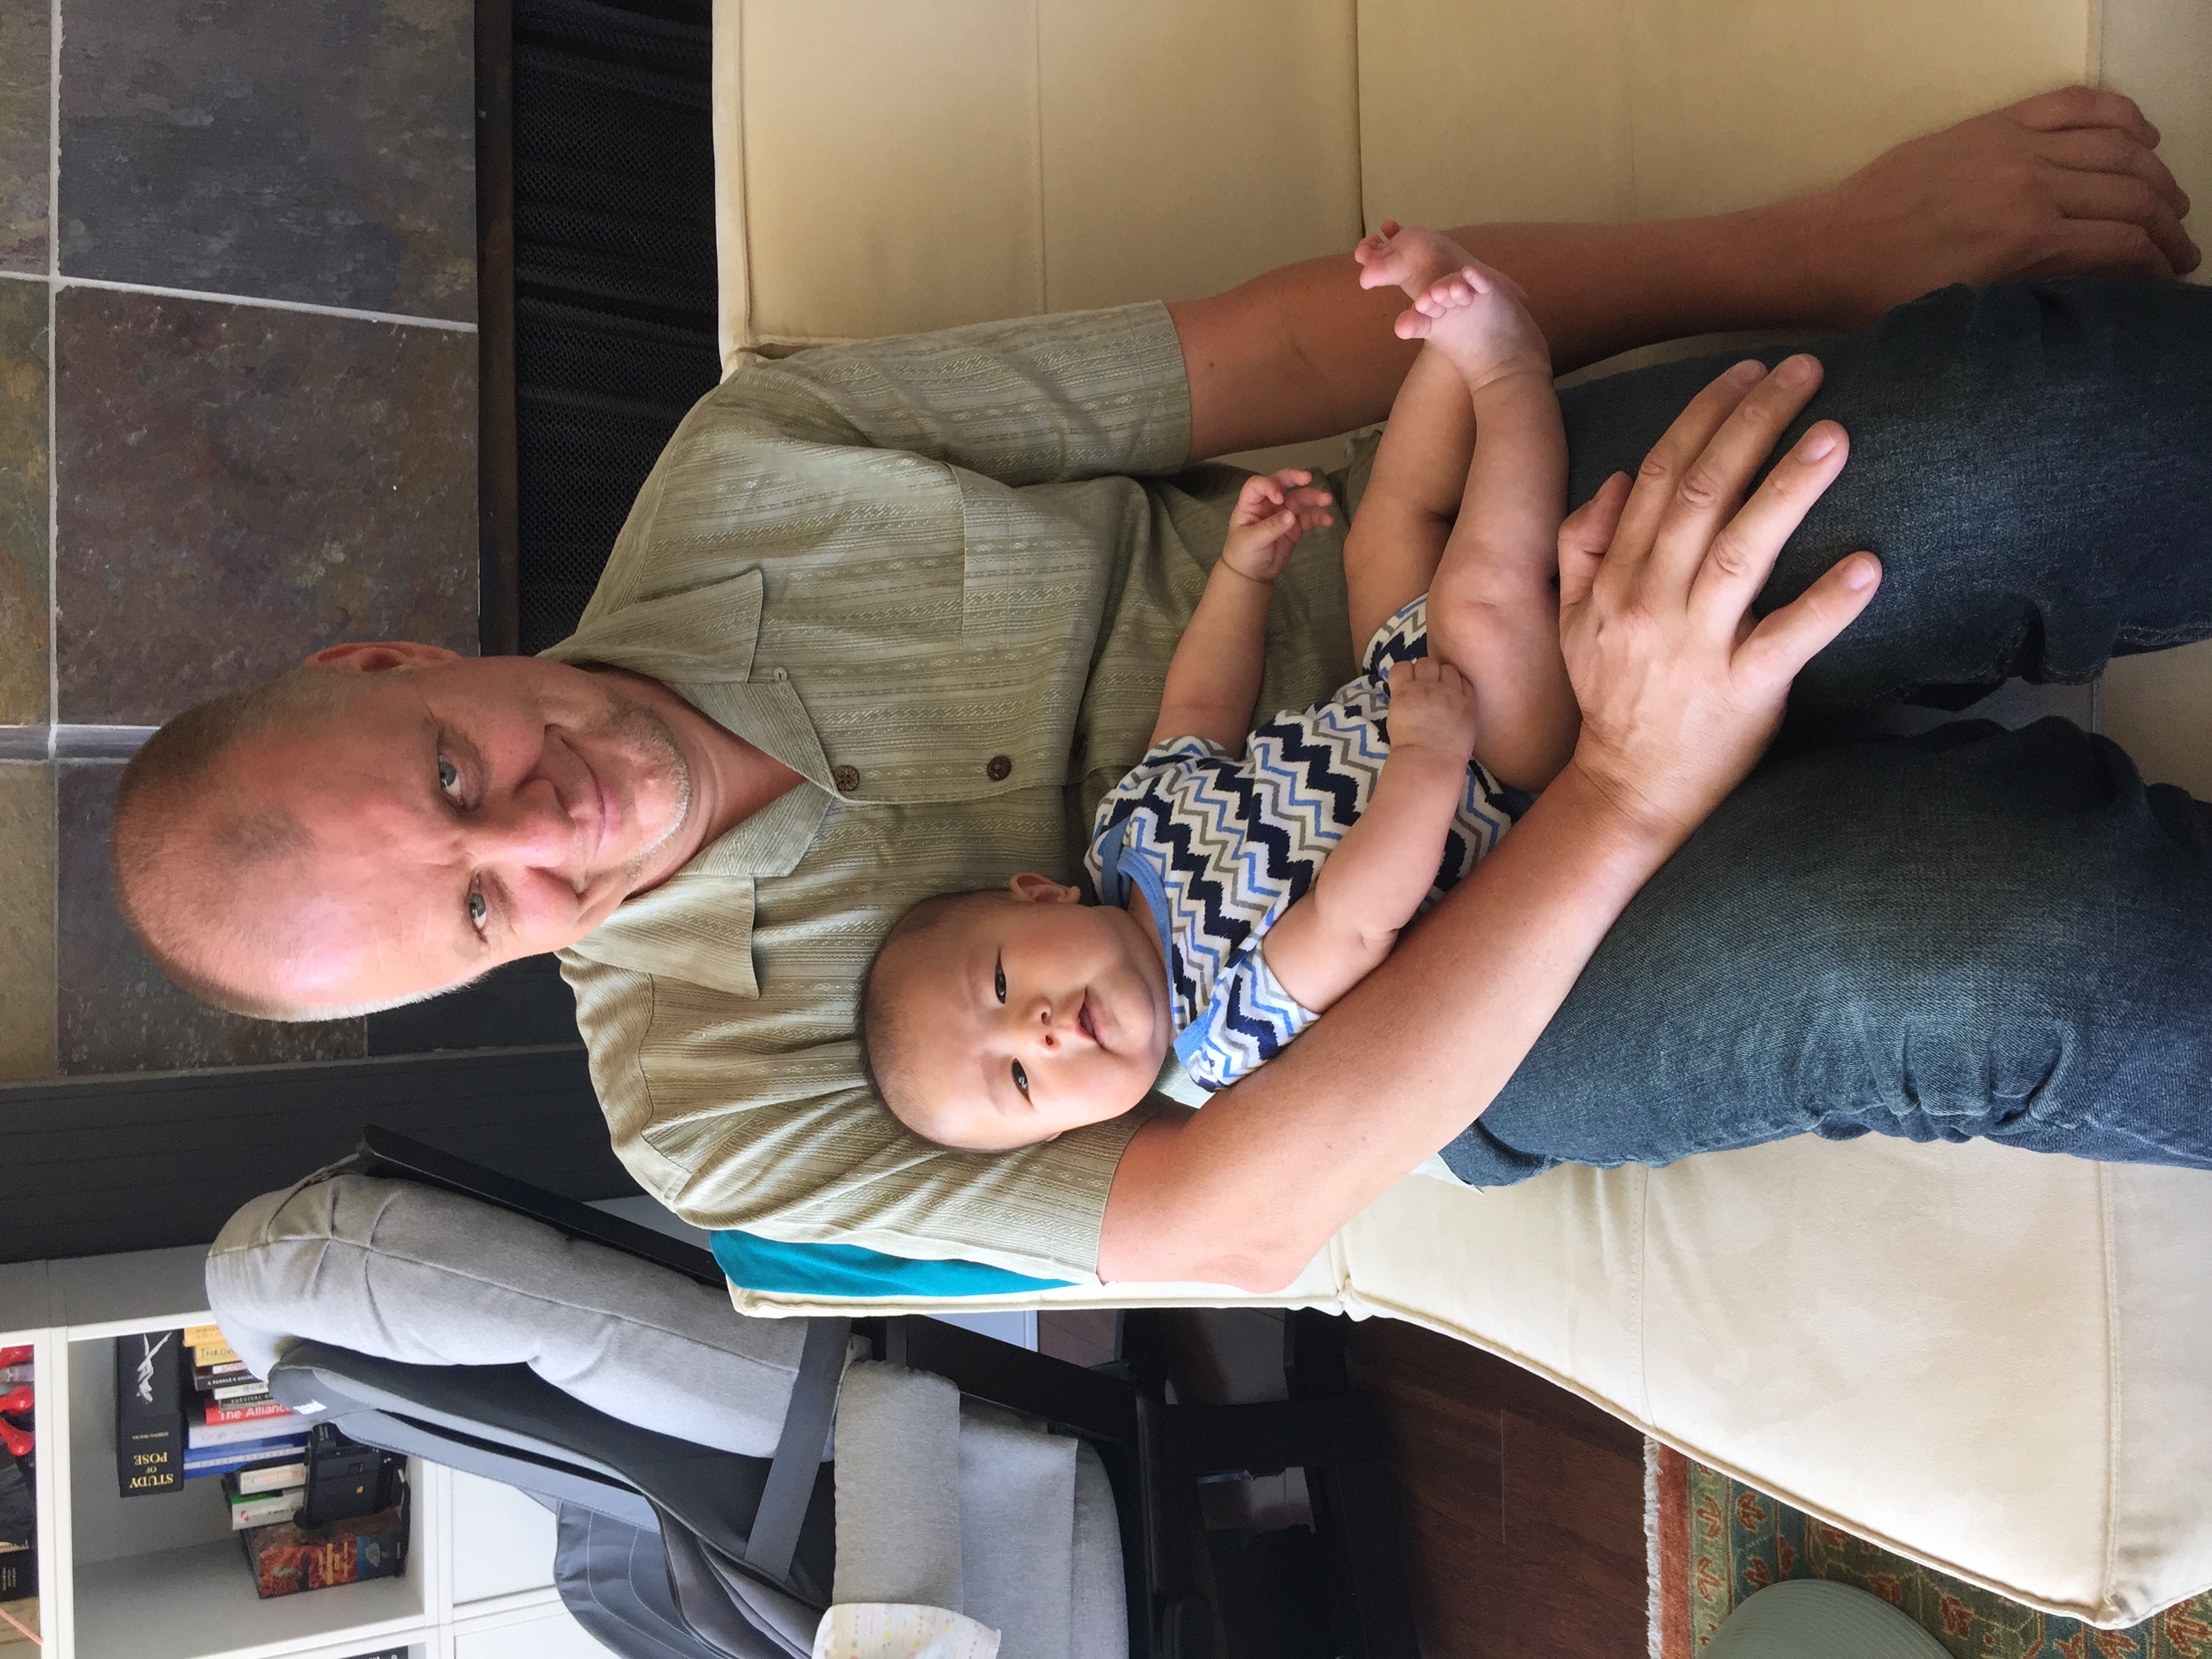
John fancies himself a "fun" subject to take pictures of and you'll often find him trying to pose for pictures, specially when his wife is in the frame with him as well, so i got  a lot of pics of him doing stuff like this...SIGH...

Anyway...Since I had not thought about filling up the fuel tank when we left Stockton, we were beginning to run on fumes and I started to look around on the sectional (map) for a marina with a fuel dock. I found that the Antioch marina was one of the shockingly few marina's that showed to have a fuel dock. Around 1 PM or so we found the marina and we docked at the fuel station, literally running on fumes (yes, LITERALLY!) but then we read the little note on the fuel station saying "We are sorry to inform you that the fuel station is out of order, while we are working on a brand new system. We expect the new system to be operational in March 2016" (Note we left Stockton on Mar 24th). Since it was still pretty early we figured we could probably talk to the harbor master, so we were impressed to find a phone next to the sign that would allow us to talk to the harbor master. But...also out of order...

Next was a trip to the Harbor master office at the end of the dock and this is when you start to realize the flip side of increased security systems at modern day marina's. Gone are the days that you can simply drive up to a marina and waltz onto the docks without any security gates or nothin'. This marina had a security gate which will open easily without a key from the dock side, but not so much from the shore side. There was no-one around to let us back in, once we left the gate, so we found the phone number for the harbor master and proceeded to call...No answer! Things were not looking up for us...Finally we found a nice lady and we explained our predicament and since she was just going to do her laundry in the laundryroom, she would be able to let us back in if the harbor master was not around. So we went to the harbor master office and then we learned that the harbor master was out for lunch but would be back shortly and indeed, the harbor master ('s assistant) showed up and informed us that indeed they had JUST upgraded the fuel systems but she was not sure if it was operational or not. Informing her that she was our only hope of ever making it to RWC she agreed to let us TRY the fuel pump. She turned on the system and.....SUCCESS! We were saved and filled up the tank to the brim, which takes about 10 gallons (38L) it turns out.

Overview of the first leg of the trip and putting it a little in perspective

Since it was still pretty early and Antioch only brought us about 25 miles closer to RWC (of the 93 miles total trip) we decided to push on as far as John could stomach it (and since he had to get back home that day, we needed somewhere close to a Bart station or other public transportation, which is NOT a trivial issue in California, the land where everyone drives!).

At around 3:28 PM we cruised into Pittsburg marina and found a nice little dock in the marina. Everything sorted with the harbor master for the overnight fee, we set out to find the nice little brewpub and pizza place we read about on Yelp; EJ Phair Brewing Company, and it was walking distance (crawling distance, really) from the Marina! 

Having treated John to a beer and a Pizza and putting him on a bus to the Bart station (which took the best part of an hour to get to, apparently) it was a good conclusion of the first part of the two-part trip to Redwood City...

The first time EVER sailing (Just the jib and with the engine on, just in case...of what?)

The second part of the trip was going to be twice as long (about 61 miles) but I started off as soon as it was light (around 7 AM). At first, as usual, there was no wind so had to motor all the way to San Pable, but at some point the wind started picking up and it was a perfect South-westerly wind and it thought it would be nice to actually start SAILING this boat, which, until up to that point, has really been little much as an old wooden motorboat (urgh!). Not quite sure of myself, i decided only to use the jib, which is easily unfurled by myself, using the furling mechanism. I was not quite sure if I would be making any speed with just the jib (I should have known better...The jib does most of the work, speed wise) so left the motor on...

WOOOOOOT I'm sailing!

The jib was looking great and soon I felt comfortable turning off the engine and just doing what the Kettenburg was made for!


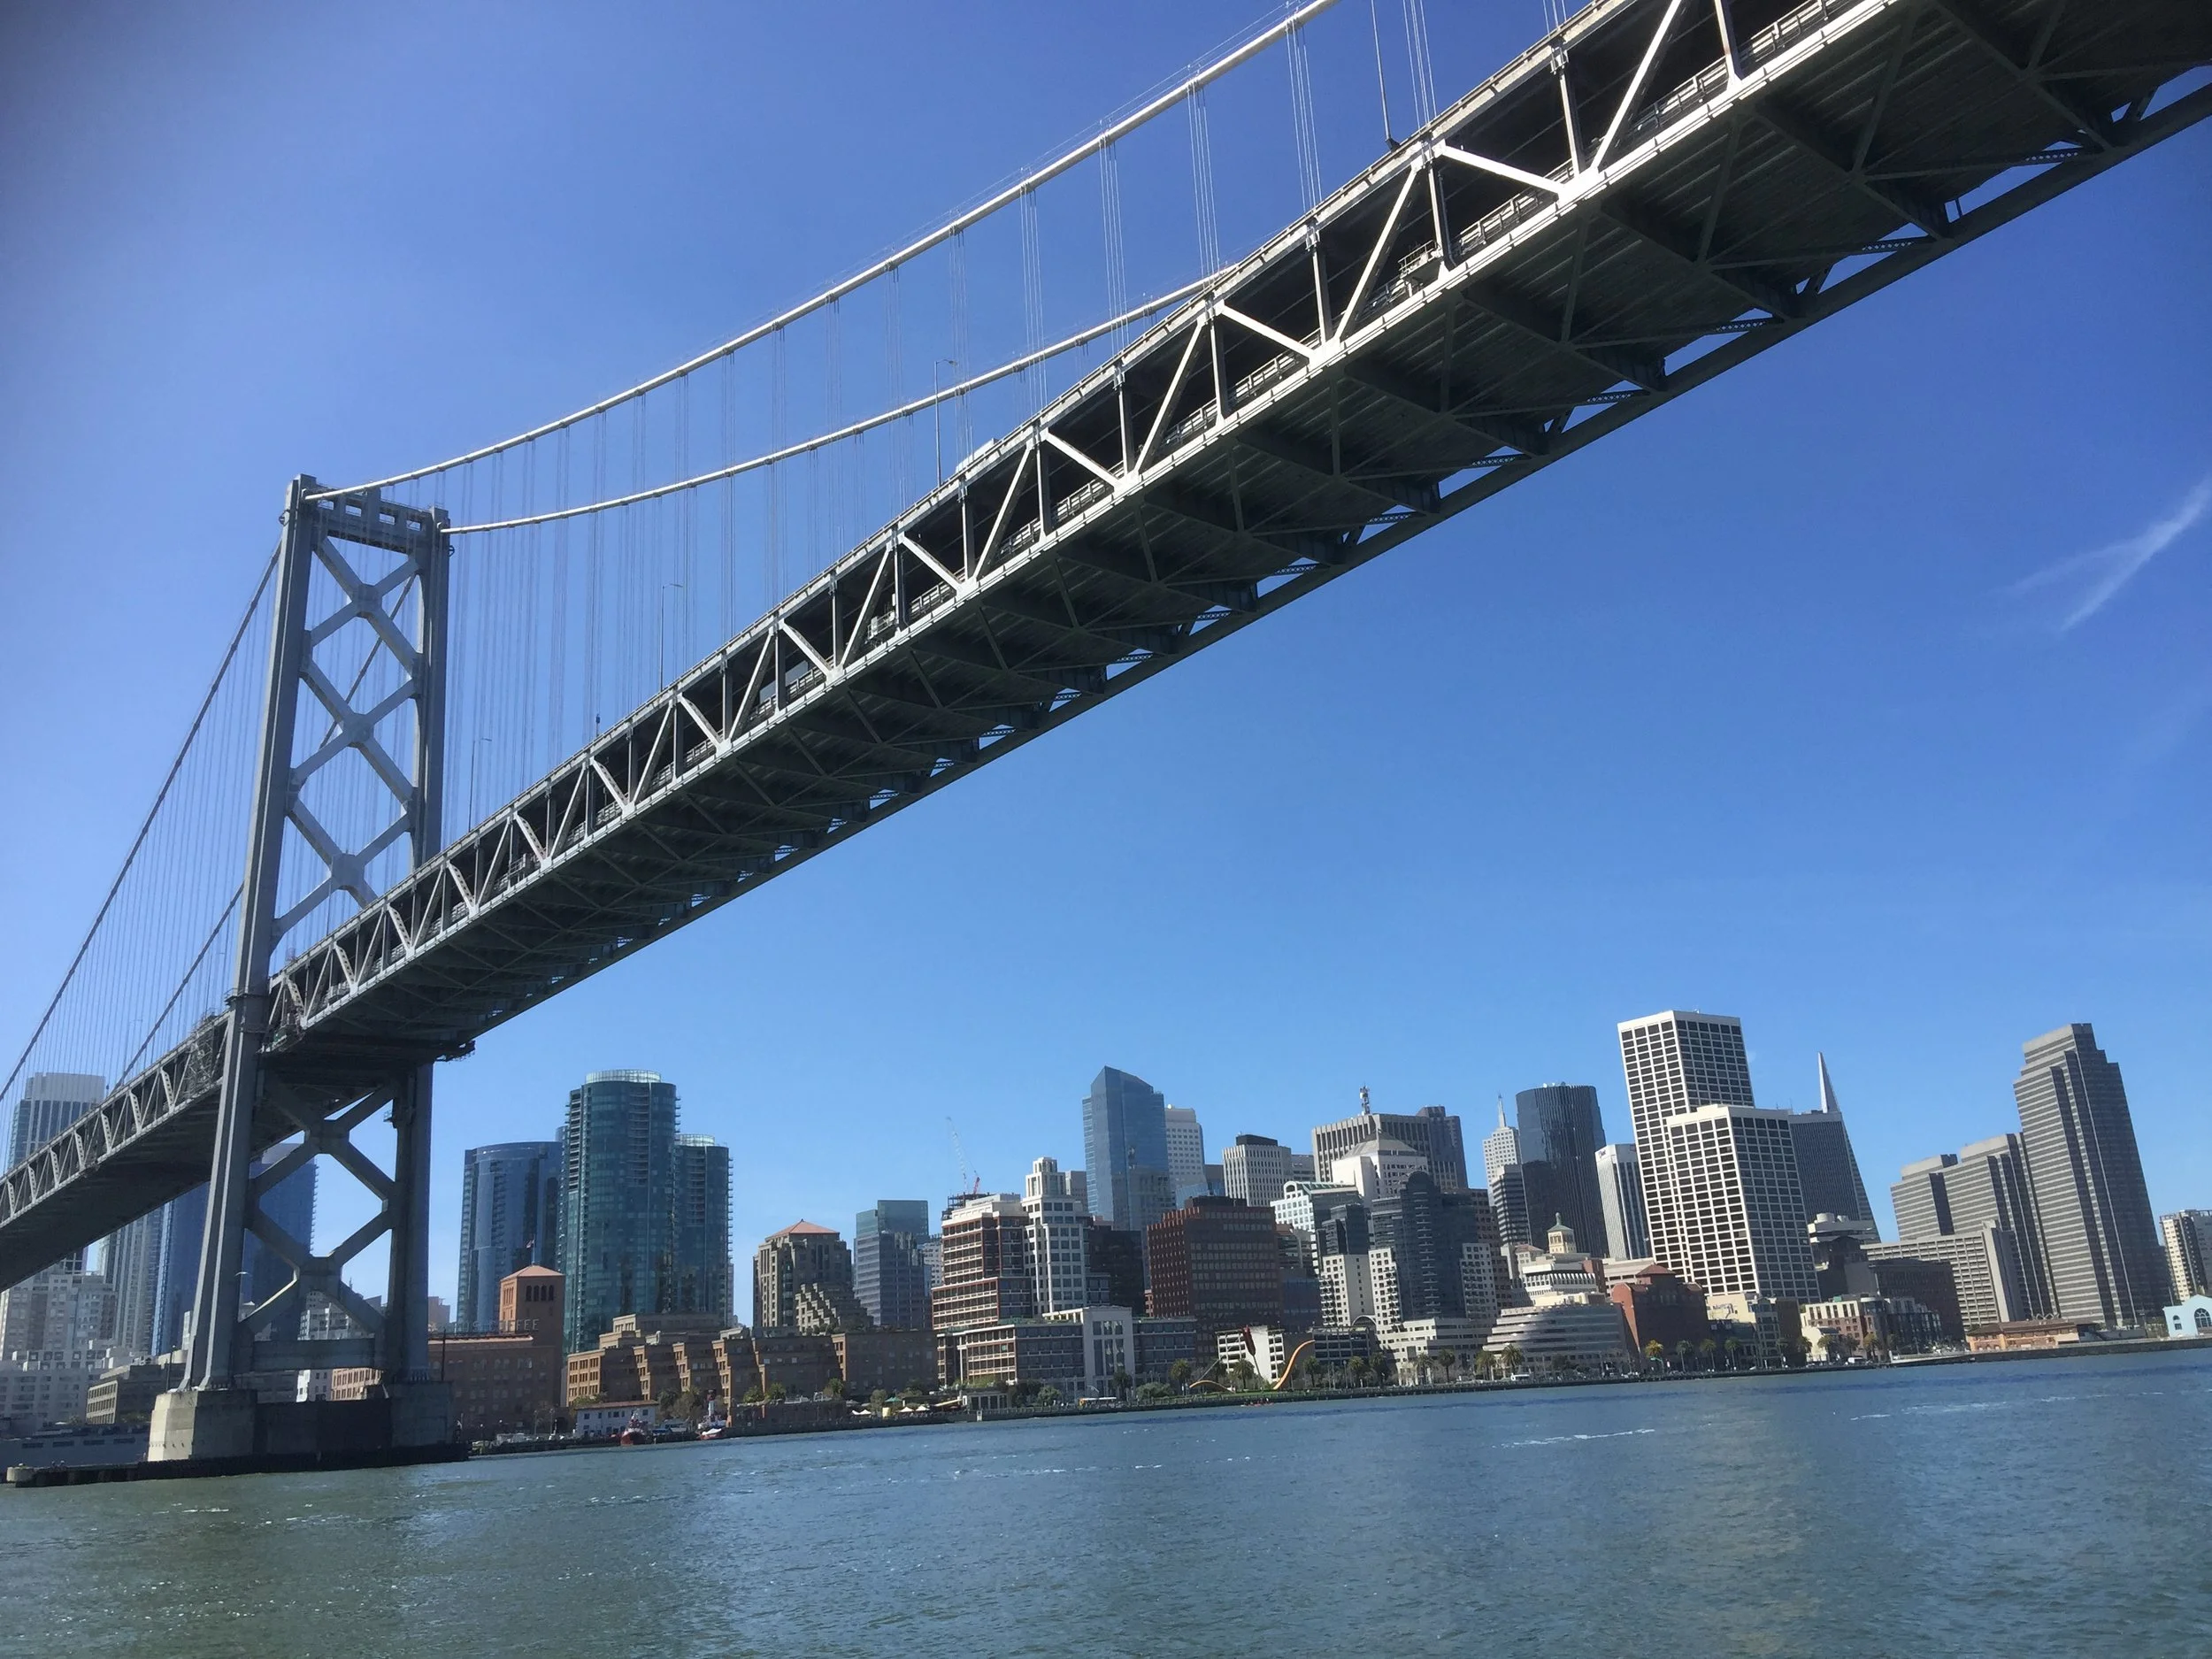
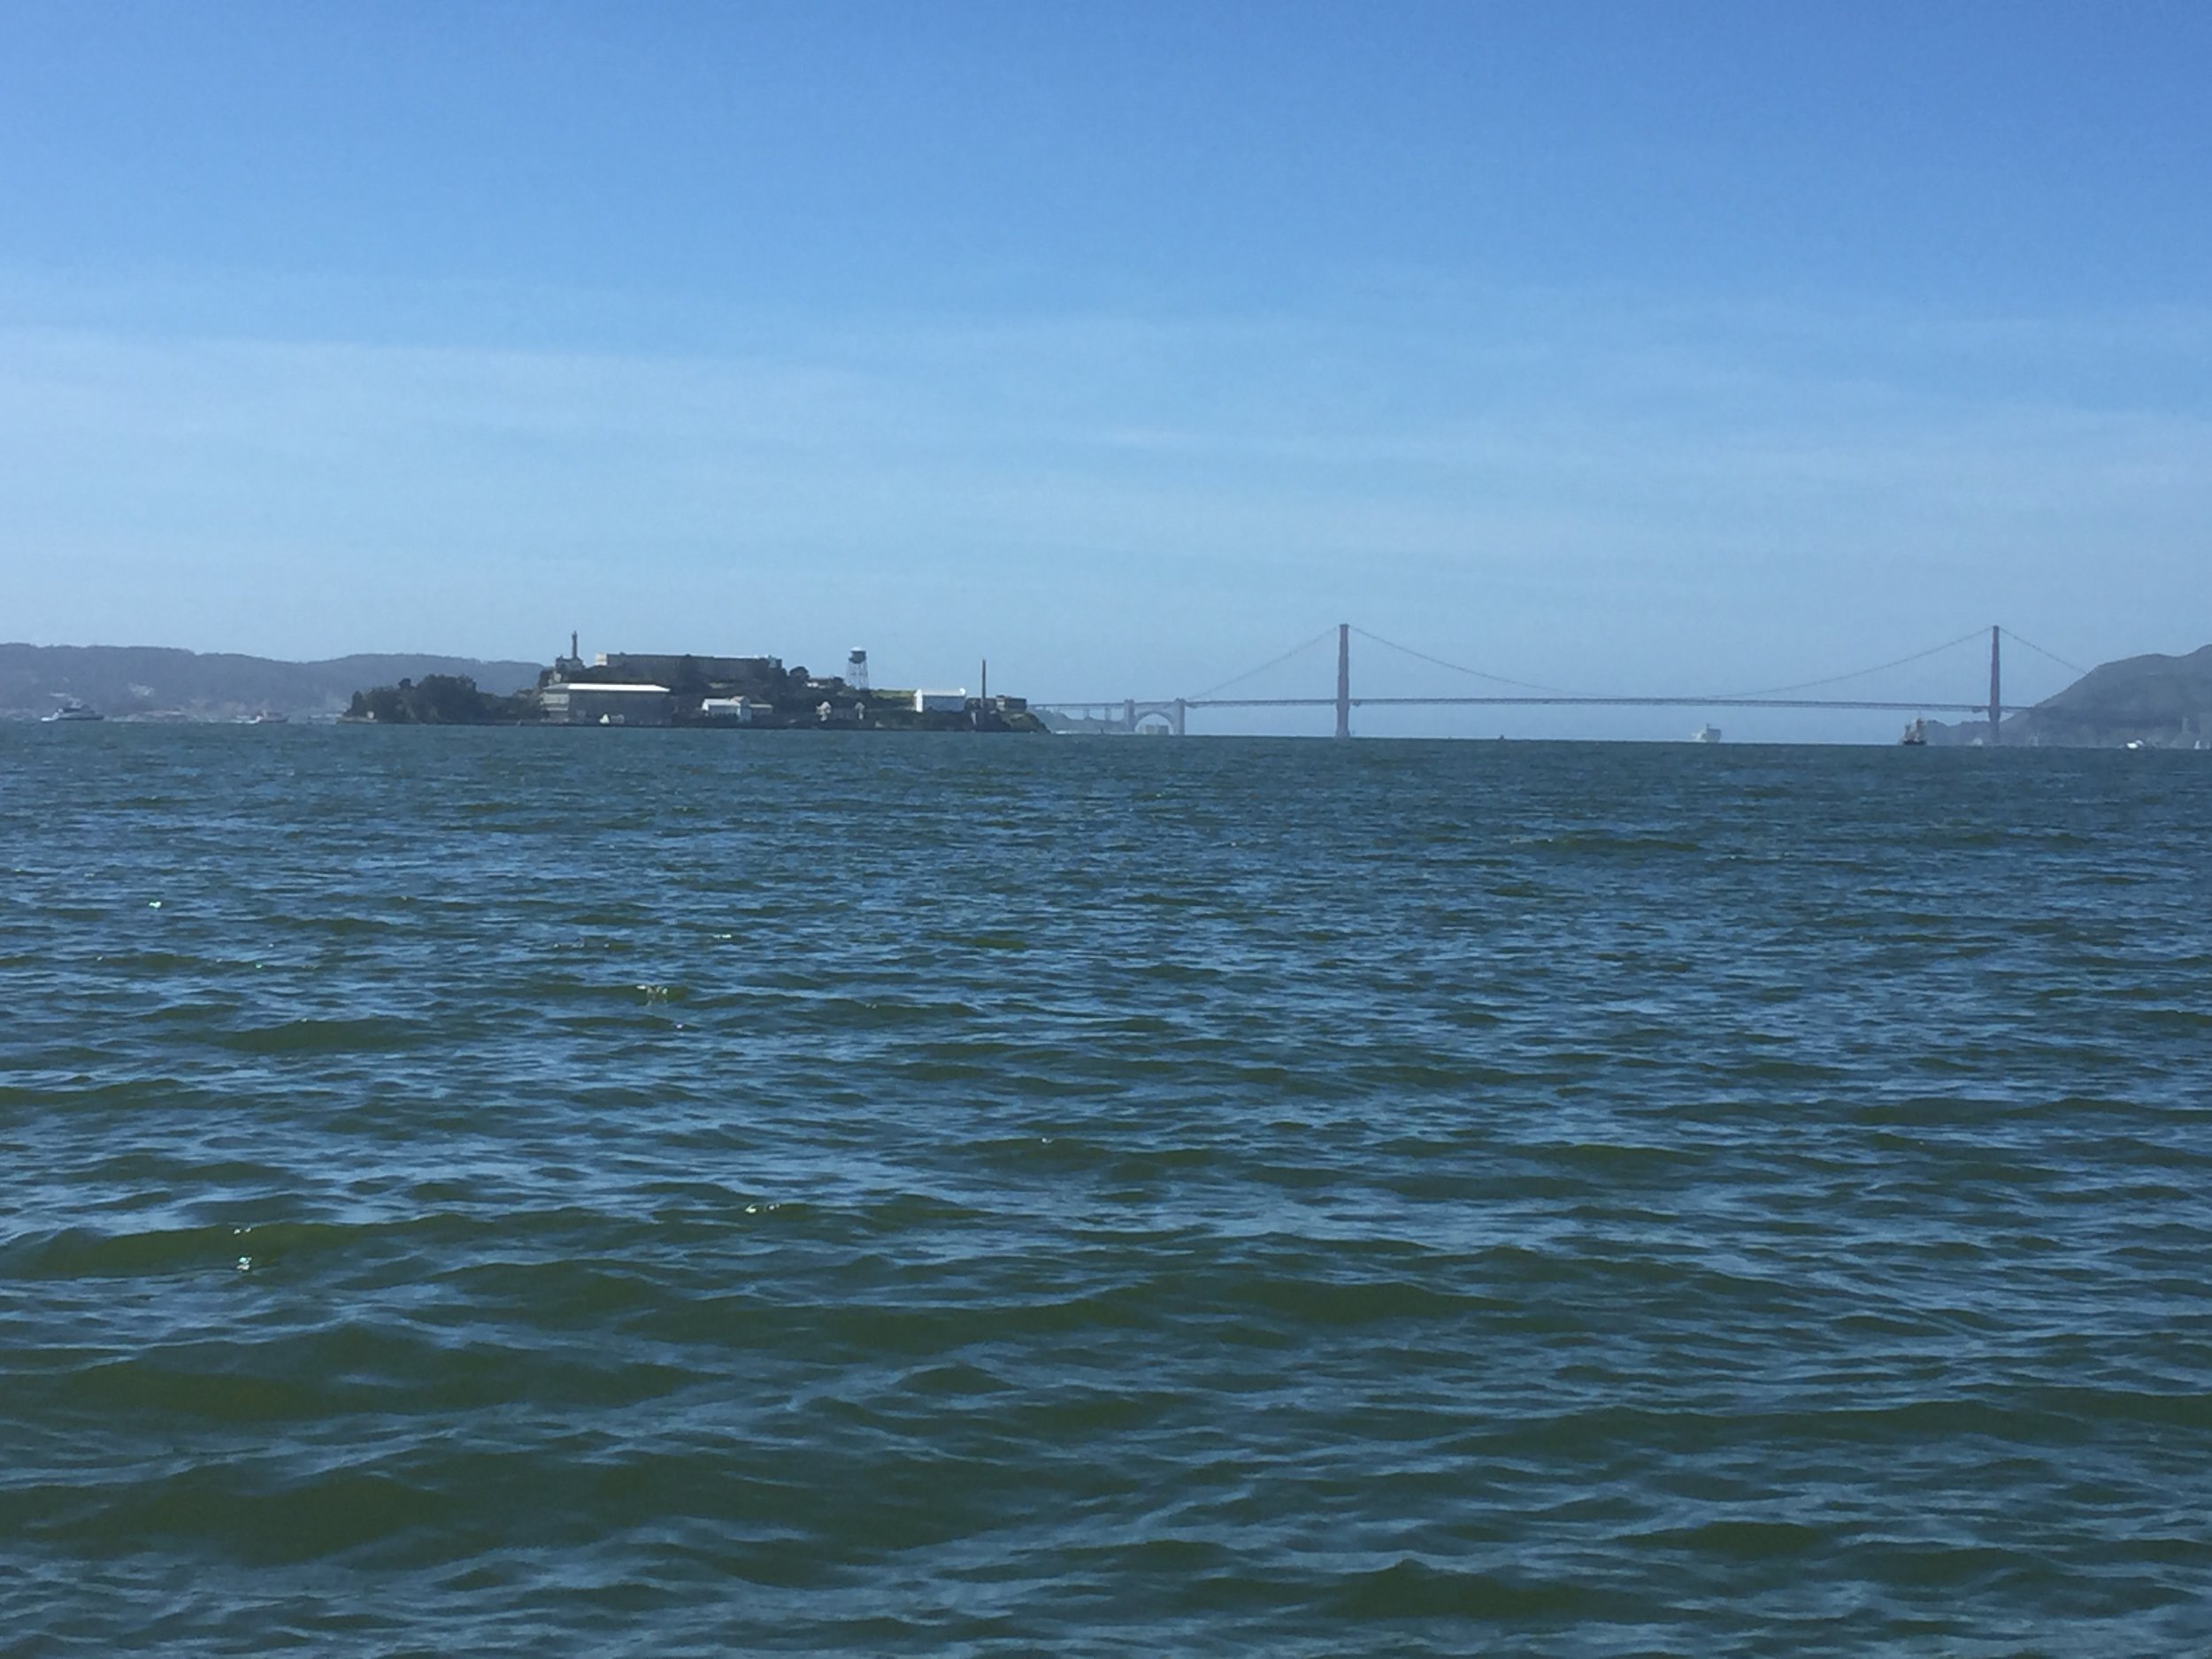
It wasn't long before the wind died down again so decided to turn the engine back on and roll up the jib, which is easy to do by yourself from the cockpit. It wasn't long when I sighted, what most people in the bay area just call "The CIty" (And NEVER Frisco! San Fran, maybe) (Yes, there is only one REAL city in the bay area and don't even get me started on Oaktown).

Still MILES away, but it definitely is San Franciso!

Still MILES away, but it definitely is San Franciso!

As you can see, no wind so no jib, but that would soon be different! But first...More pics of the city

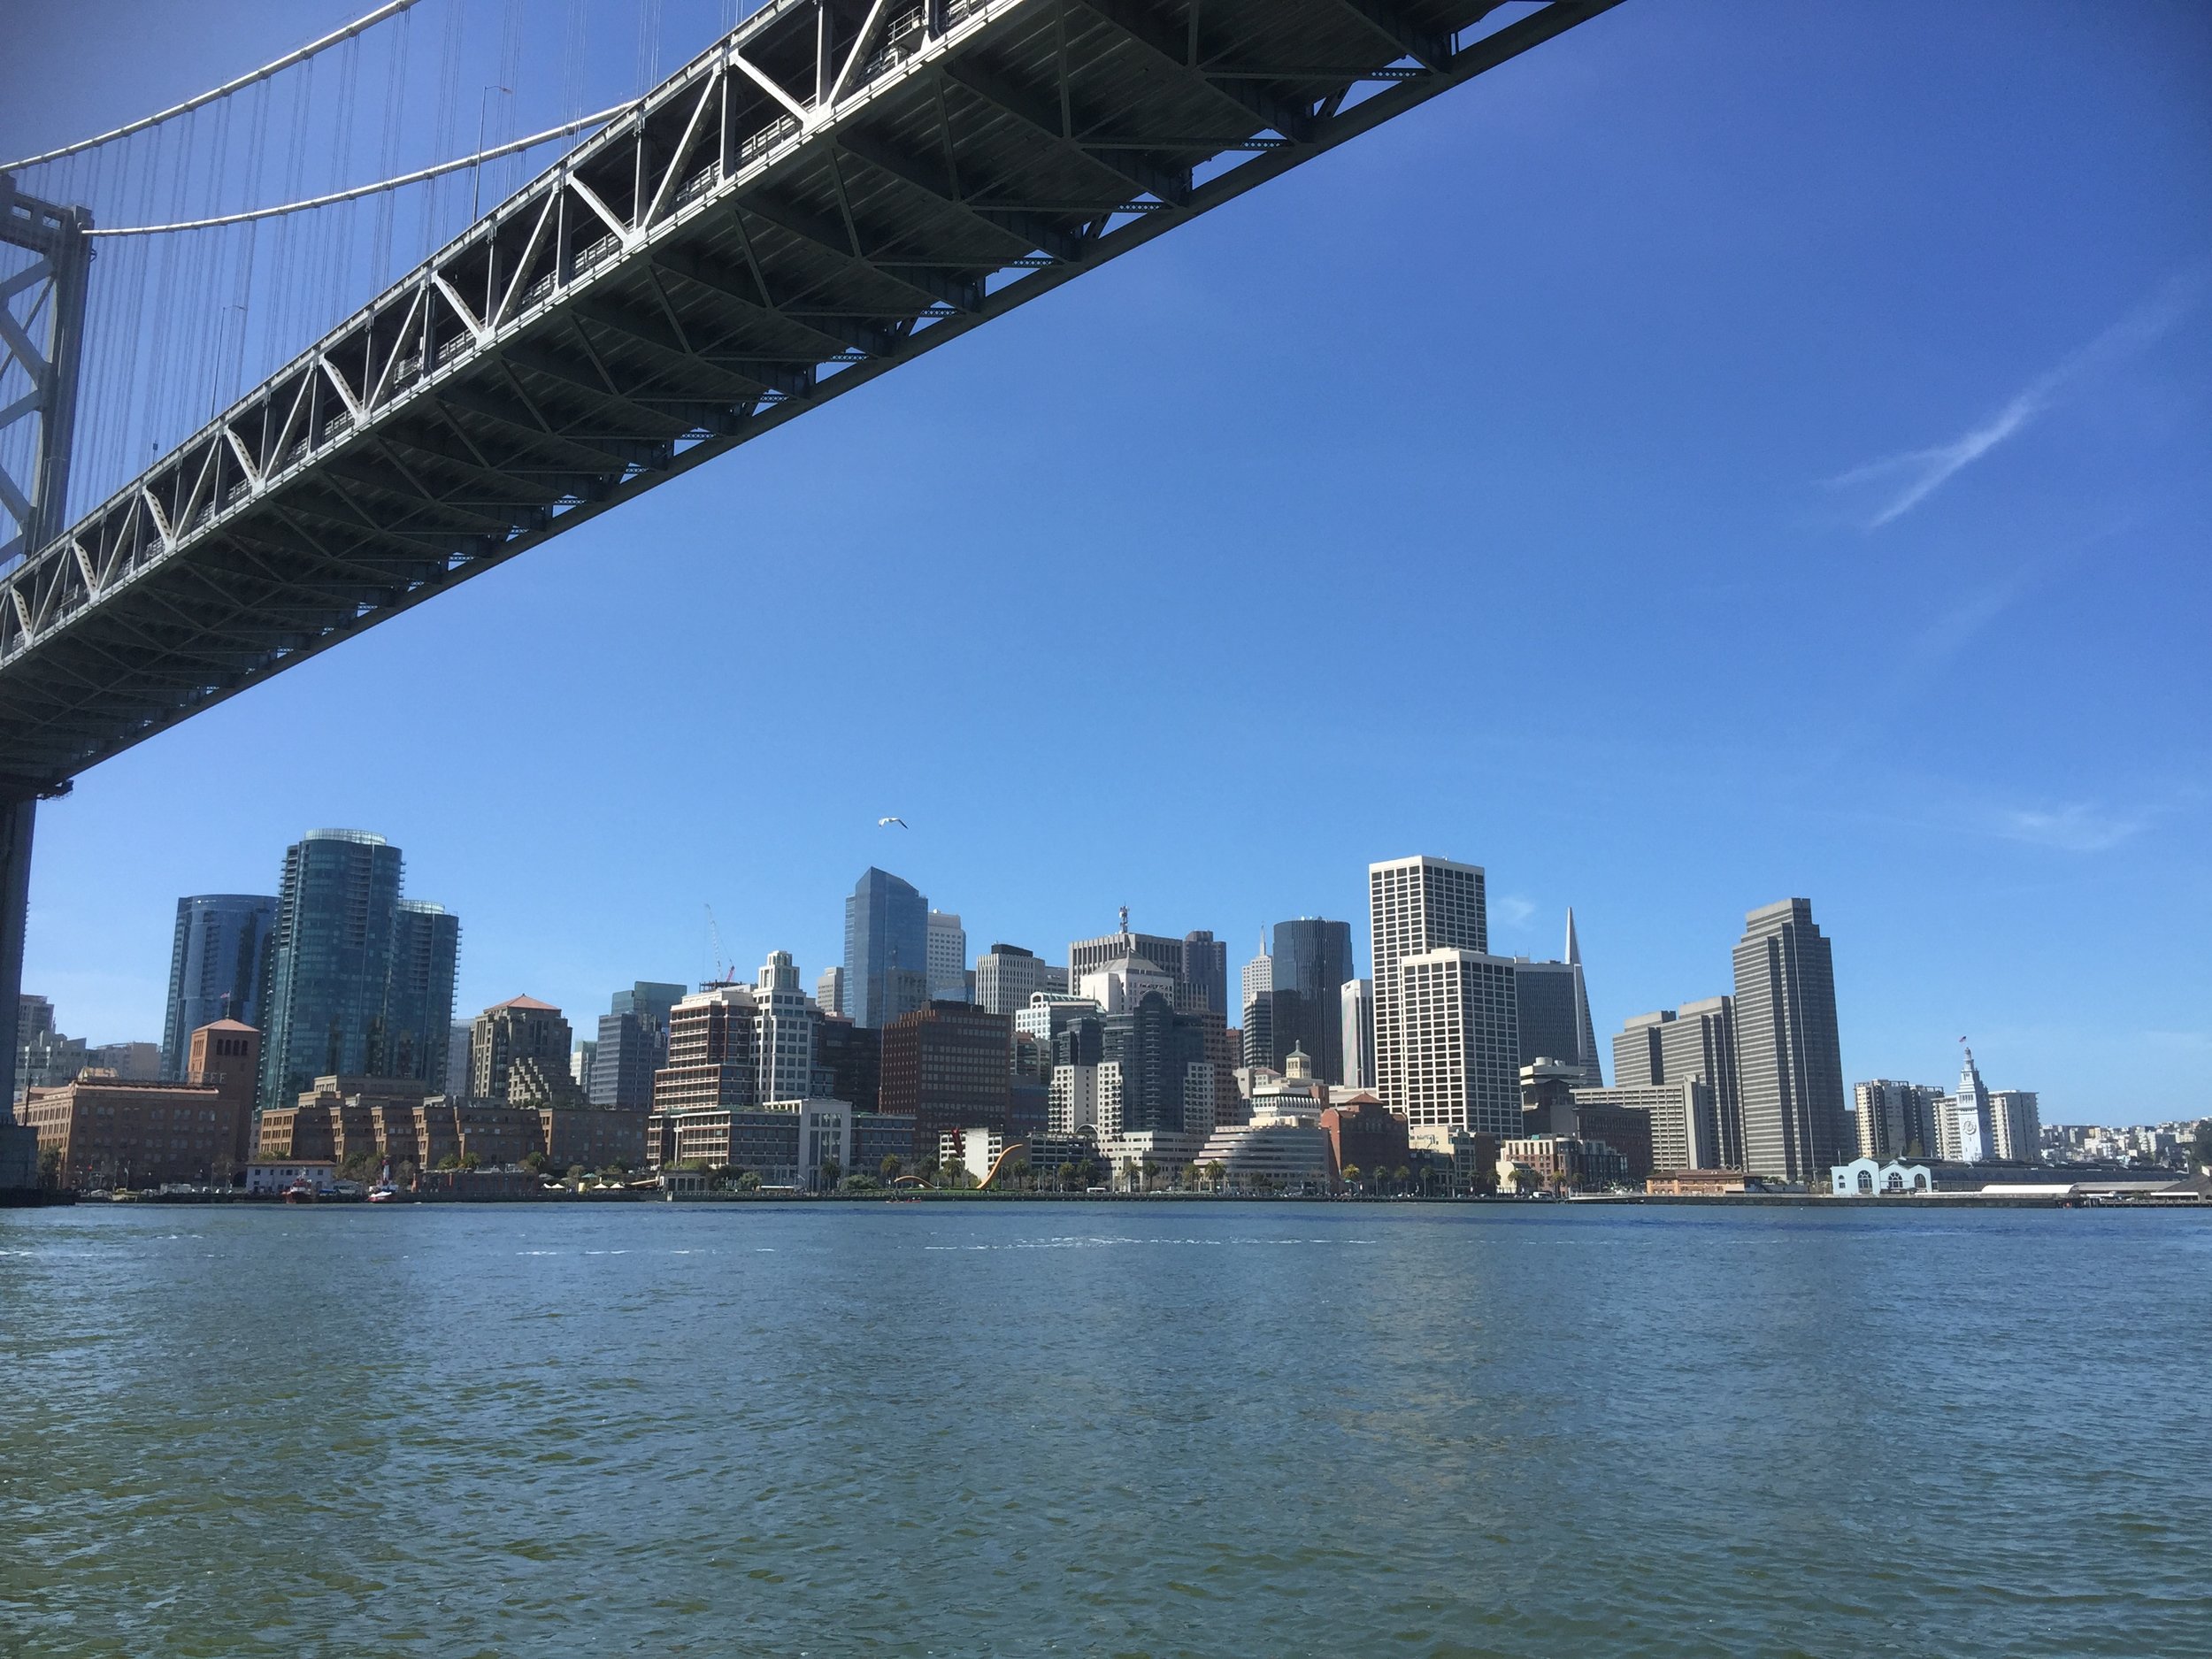
Having reached San Francisco, I was still 29 miles from Redwood City and although the wind had picked up, it was straight SOUTH which was the way I was going so not good...It is very unusual to have South wind that late in the day in the Bay, but Spring is still very fickle and the prevailing summer winds (NW after 1 PM, 15-25 knots, typically) had not established themselves yet. But around SFO (the airport) the winds starting shifting again to W to NW which prompted me to unfurl the jib again and save some fuel!

And i also quickly learned "don't film and sail" as you will see. But at this point I was getting close to Redwood City and sailing had put me a little off course, so soon I was motoring again...

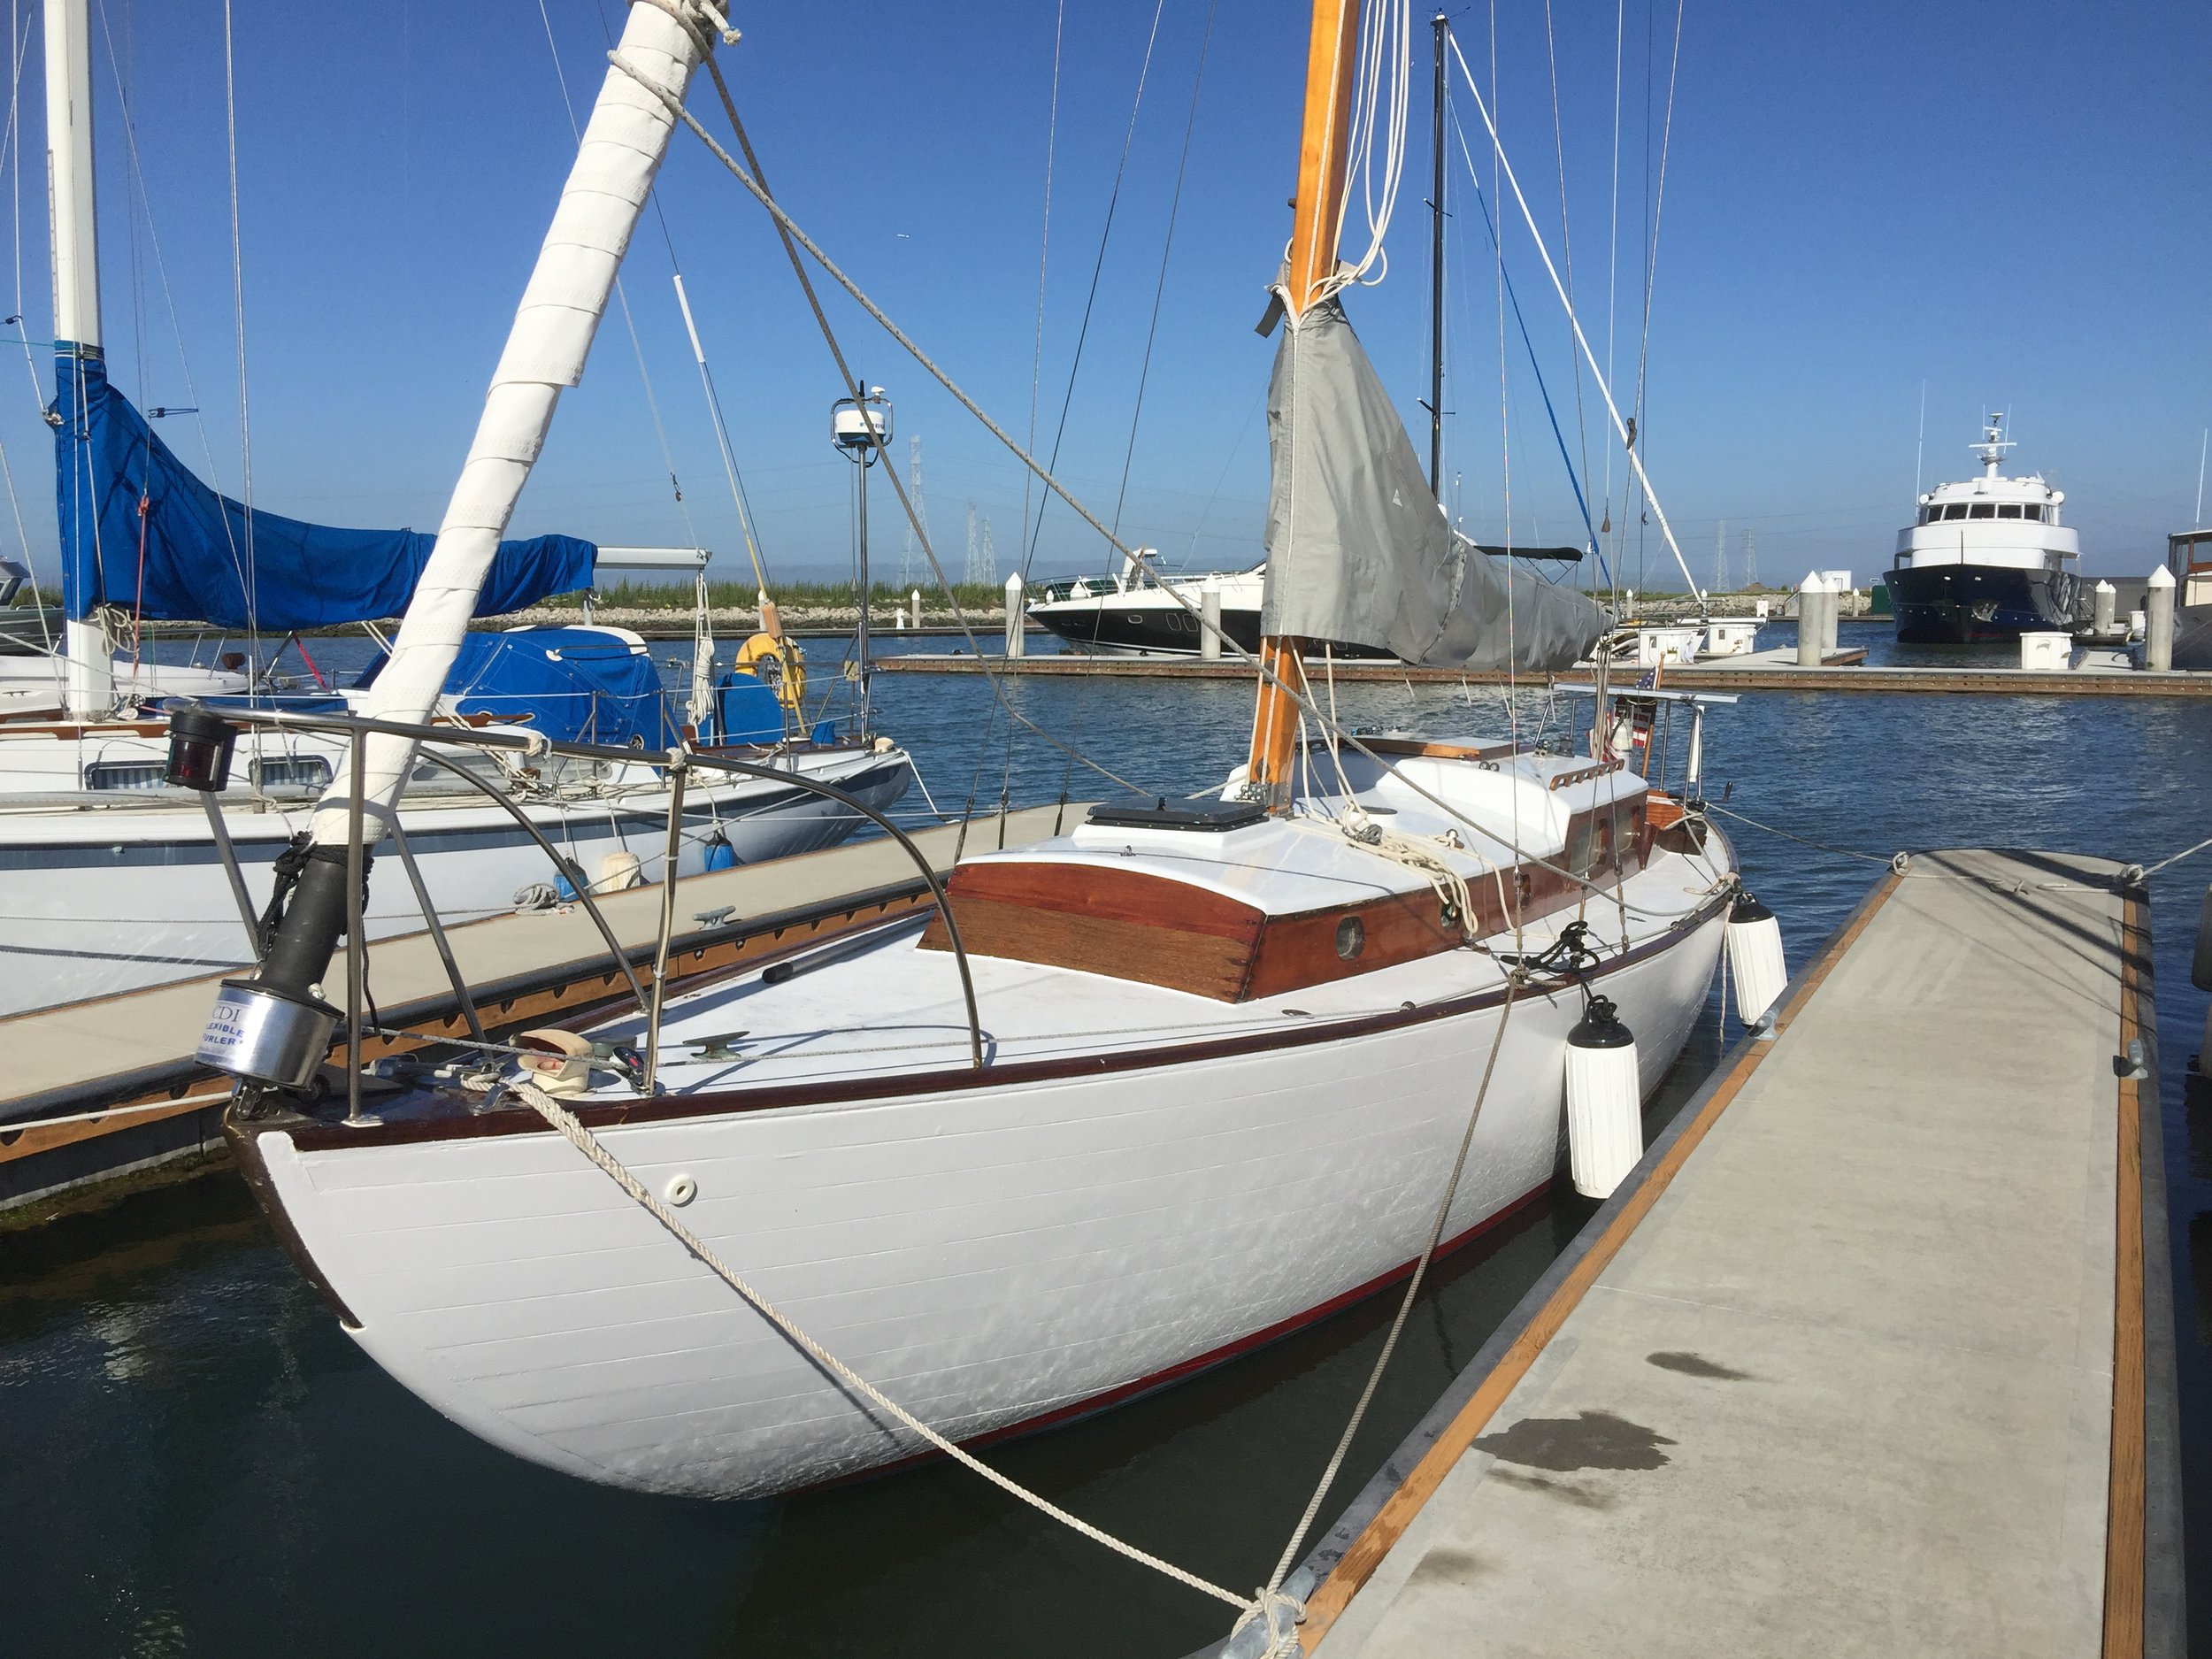
Once leaving the bay and entering the Redwood City channel, the Westpoint Marina is still quite a ways away, something I soon grew tired of and prompting me to look for alternative home port but for now I had made it all in one piece and the old lady looked quite happy in her new slip!

Comment

Maiden voyage

1 Comment

Maiden voyage

OK..That was just cruel...Teasing the last post with "...and it does not go to plan AT ALL" and then waiting two and a half months for the next post is just wrong....Apologies...Especially since I now know that almost all of the former owners are reading this post! (Hello John, Gary, Frank o/).

It had been almost a year since I had brought back the boat from the Navajo lake in southern Colorado, on the New Mexico border to Stockton at Ladd's Marina and it was finally ready to take her to her new homeport at Westpoint Harbour in Redwood city. She was all rigged up, filled up with Diesel and water and ready to go on the almost 80 miles trek.

All gassed up and some place to go

My friend Leif had agreed to accompany me on the maiden voyage and we made the trip with my friend John who had agreed to drop us off at Ladd's so we did not have to pick up the car later. Everything was looking great and we cast off at about 10:30...Little later than we hoped, but we were on our way!

Early on in the trip...No wind so motor city

Everything was going swimmingly and although there was no wind, in this case that was OK since most prevalent winds would have been straight against us, so this was actually helping us...Even the tide (there is a significant tide, even this far into the interior of California!) was helping us, since it was going out, helping us a half knot (when you are going 6 knots, half a knot is helpful!).

We were enjoying the great Californian spring with a nice temp in the sixties (about 17-18 C) and just chatting away. I had always assumed this would be a two day trip, since 80 miles at 6 knots is at least 13 hours and that is quite a lot for a maiden voyage...I had set my sights on somewhere around Richmond or even Berkeley to make it easy for Leif to get back hope via Bart or be close enough to be picked up.

My friend Leif and me in my Kettenburg K-38 (Blue Heron Jr.) on our way from the marina where she was fixed up to the new home port of Redwood City, CA.


The state of the hull

When I had brought her to the marina, there was a lot of work that was needed, and especially to the hull, since she had been out of the water almost 6 months so the hull planks had shrunk a significant amount and it was quite a feat by the lads from Ladd's to address this with lots of cotton and tar. She had not been completely watertight when they were done but the bilge pump was perfectly capable to pump out any water that made its way in.

Before...

After...

Underwater-ship fully caulked and painted

So, with the hull mostly fixed I had actually turned off the bilge pump just before the trip to ensure I was not draining the battery, since I was not sure how long that old battery would last and I had not yet connected the solar panel. (asstute readers know where this is going!). About an hour and a half into the trip I decided on a whim to check the bilge area....

OMG...

What I saw there made my stomach turn and do a double summersault that would have won the gold medal at the Olympics I am sure! The water had actually reached up almost to the floor in the cabin and luckily I had not been able to turn off the bigger of the two bilge pumps that were installed since that pump was running full stop trying to stop the flood!

I quickly turned on the other (smaller) pump that is lower in the bilge and it was quickly able to clear most of the water, but I could see it flood in as fast as the pump could pump it out! A quick check in the cockpit under the motor panel showed that the water was GUSHING in from the keel bolt (outlined in pic below.

Water came in through this bolt(s). Here shown in better, drier times

Now I had to decide what to do...I was only 1.5 hours into what surely was going to be a two day trip and my home port in Redwood City does not have a boat lift or anything, so there was no easy way to fix anything there...Decision was easy...Turn around! I informed Leif that we "were making a little water" and that I suggested that we turn around, PRONTO! Our friend John had been following us for about 30 min into our trip, but was already on his way home. He had some meetings later that day, but agreed to pick us up later that day.

So we doubled back to Ladd's Marina and to say that they were surprised to see me is an understatement! I explained the situation and beforeI knew it, they started to haul her out!

It was soon very obvious what had happened...The lagbolt that holds up the propeller housing had clearly failed and had created a nice little opening for al that water to gush in...The engine vibration probably had a lot to do with that, since I had not actually run the engine for any length of time before.

I am also pretty sure that Frank (the previous owner) never had much use for running the engine for any length of time, since you could not go far on that lake and if there was no wind, I am sure he had no reason to be on the water so this engine had never really run all that long in the last 15 years (Frank, correct me if I am wrong) so that bolt never had much time to be tested before.

The guys at Ladd's fixed the bolt that very same day and we had also discovered that some of the caulking at the stern was leaking so they fixed that (for free!) as well...

So...Now I was back where I started and still had to move the little lady to Redwood City, but that voyage would have to wait...

1 Comment

Making a proper SAILING boat out of her

1 Comment

Making a proper SAILING boat out of her

Todays installment shows how we finished working on the old lady and putting up the sails and ready her for the trip from Stockton to Redwood City.

While the lads at Ladd's where working on the painting the deck, I took out all the sails that I had for the boat and spread them out on the grass in the San Leandro marina park. The relatively new mainsail and absolutely spanking new jib looked in great shape after being in a bag on the boat for about 7 months. There were two more jibs, one smaller storm jib and one regular jib and a spinnaker (no pics) although the regular jib was in pretty rough shape, although in a pinch it could be put back on, I guess (would have to replace the front rig).

I had finished all of the pieces after the hatch had been restored and everything was attached to were it was supposed to be attached and it was time for the mast to be installed with all the rigging and boom and what have you. The people at Ladd's marina had the mast up in a jiffy and the rigging installed and since I was not there, no pics of the process, but here's a before and after shot

After the underwater line had been fixed before the work on the above-waterline commenced

Mast up and boom attached

On a calm sunny day in mid-February and with the help of Allen of Ladd's, I got the main sail up in no time. Loosing a couple of clevis pins in the process I had to improvise a little for some of the attachments, but the main sail was up and looking good!

Putting up the roller jib was a two man job and we started putting the jib back on which is a bit finicky since you have to slide the rope into a small slot, but after about a twenty minute struggle we had the jib up....AND then we realized that we had unfurled the furling jib so we could not actually roll up the jib! So we had to undo the whole process, roll up the rolling drum with enough rope to be able to roll up the jib and redo the threading process, which, after having done it once, was much easier ofcourse ("Aldoende leert men").

It's also important to roll up the jib in the correct direction, since one side of the jib is coated in a UV-resistant fabric, which is important since this jib does not come with a protective sleeve to shield it from the harsh UV rays from the sun. And now we have a SAILING boat!


Next time, on MyKettenburg.com

Having the boat all set to go, we embark on the inaugural 84 mile trek from Stockton to Redwood City, and, spoiler alert, it does not go to plan AT ALL!

1 Comment

Hatching a plan....

Comment

Hatching a plan....

Father forgive me, it has been 5 month since my last, huh, blog.

There is one more piece I had worked on, and that is the hatch. The hatch was in decent shape, although a little worse for wear like the rest of the pieces. The front piece was broken and had been repaired, but it was cracked all the way through so that at least had to be replaced. The bottom looked decent but the top was quite weathered and needed to be dealt with. The hatch is just sliding on four pieces of plastic which made the hatch a little hard to slide and it was also laying on top of two wood sliders and did not have any rails or anything to slide on.

I had looked on the internet at some of the other kettenburgs and had found a cool looking hatch with teak slats and felt that it looked better than the white covered hatch I now had so I decided to see if I could recreate that hatch.

A picture of a nice hatch I found on the internet on another Kettenburg

A picture of a nice hatch I found on the internet on another Kettenburg

I figured I should not try to put the slats on the existing hatch, since it would be far to high so I decided to create the hatch from scratch. I figured I would take some maple or other strong wood to create the bottom and then put on the slats perpendicular to give it strength and make it look as nice as the one in the picture. I got some maple planks about 10 inches wide and using the jointer I made the edges nice and straight and glued them together.

I probably should just have taken a piece of marine plywood to make the base, but why make it easy on yourself!

Then I ordered some teak slats to make the top and that is as far as I got. I took another look at the existing hatch and felt more and more that it was probably easier to just fix that hatch, rather then building a new one. I figured I could always built a new one later while getting the old hatch in order...So that is what I did.

The first thing I had to do was to remove the front piece so it could be replaced. It was cracked and repaired and did not look very nice, so got my chisel and started wailing at it.

The front piece had been expertly attached to the hatch with some sort of tongue-in-groove (not the correct term) splice and epoxied into place so it was quite a tour de force to remove it, but I managed to do it, albeit it with some damage to the hatch that I had to repair. Bring on the Bondo! This is a filler, usually used on cars for repairs etc. but my friend John and a jar of it so I used it.

I sanded down the pieces that were sticking out, but some of the holes I filled with Bondo and let it set after which I sanded it down. It is quite easy to do with Bondo and it also sets in less than an hour so easy to work with (Bondo, make the check payable to "Anthonius P.N de Boer, thanks).

Next I had to make a piece to replace the piece i had removed. It was a little tricky since the hatch is curved but I managed to make the piece fit nicely after a lot of patient sanding and fitting.

The original hatch had a little rounded edge but I decided not to try to recreate that and just put a pice of wood covering the new piece and the edge. I only had a piece of red oak, which is far from ideal, since it is not that durable, but since I plan to replace the hatch at some point anyway, I went with it.

I epoxied the main piece to the hatch and also used 5 screws to hold it down. I counter sinked the screws and created plugs and sanded it all down flush.

Good...Now I had hatch that is in pretty good shape and only need to focus on painting and staining it.

Previously I had started to sand down the top which looked like it had been epoxied since it was quite tough to sand it down. I probably should not have bothered with sanding it down to the wood and just did a light sanding, but it was too late for that. I had actually sanded it down so hard in certain places, that there were now holes and indentations in the wood...So, time for Bondo again!

Now I was ready for staining and painting. I was going to use the regular stain I use for all my wood and regular white paint for the inside of the hatch, but for the outside I decided to use Epoxy again, since the rest of the deck is also epoxied. I got the west marine epoxy system and on suggestion from my friend Leif, I simply added white coloring to the epoxy to get the painted white like the rest of my deck.

The first coat of epoxy was rolled on and it started to pull holes which were hard to get rid of.

The coverage was also not great so I ended up putting on about 5 coats of epoxy but the end result looked absolutely AWESOME!


Next time...On MyKettenburg.com.

See how my Kettenburg goes from THIS:

To THIS:

Comment

Bunches of Benches

1 Comment

Bunches of Benches

This is where I go

from THIS 

To THIS

So it will end up looking (almost) like THIS:

But, how did I get here? Well...Take a look at these posts!

The slats on the starboard bench (left in the picture) is quite different from the port-side bench.

The original benches had two separate patterns of slats on the underside of the benches. Probably to prevent the warping and sagging which was unsuccessful since the benches had warped significantly, to the point of cracking.

I could not figure out why the pattern was so different so I decided to add the slats to both benches in the same way and just perpendicular to the grain, to avoid the warping in that direction. Since the benches will be mostly resting on the bench support and also be hanging from two hinges, I did not bother with the support slats in the lateral direction. This may be a decision I will come to regret, but time will tell!

I also was not going to bother with the support slats for the middle bench backside, since the wood I used was thicker that the original wood (4/4 on the new back, versus what looks to me like 3/4 on the old) and there will not be that much pressure on that bench, since it is not a bench that will be used much. (You always want to sit on the high side of the boat!).

2 inch wide, 4/4 African Mahogany for the support slats

I got some 2 inch wide, 4/4 African Mahogany pieces that I was going to use for the slats. I also had to decide how to attach the slats to the underside. In the original benches, it seems that some of the slats had been attached from the underside, while on the curved side, they were attached from above, or at least there were obvious plugs inserted and one had fallen out as well. I decided to attach the slats from the bottom, and while not absolutely necessary (It would not get a lot of water splashing on it I would imagine) , I decided to counter sink the screws and plug the holes with mahogany plugs, if anything to train in how to cut plugs and use them to make it all look nice. 

To make sure that all the slats would fit, I measured the bench-support openings and tolerances to ensure they would not stick out and prevent the benches from closing etc.

Epifanes Rapidcoat

I also started to stain/coat the slats with the Epifanes Rapidcoat. I knew I had to re-coat the slats after I had drilled the wholes and put in the plugs and sanded that side down, but at least the underside of the slats that would be touching the wood, already be coated. I would not glue the slats but only fasten them with the screws since I had already coated and varnished the benches and I was not sure that wood glue or other glues would hold.

With all the proper measurements in hand, I started to cut the slats to size. I decided on three slats for each bench and I had to sand the side that would line up with the backboard on an angle and attached them to the bench with three 3/4" brass wood screws, #8. I had previously bought a counter sink drill bit with the accompanying wood plug cutter. My friend john helped me with cutting the plugs. I had given him some scrap 4/4 afrian mahogany for cutting the plugs, but unfortunately, the drill bit did not go completely through, but we managed to cut out the 18 plugs we needed anyway.

The slats went on pretty fast and the screws by themselves feel pretty sturdy and hopefully will give the slats enough strength and prevent any warping or sagging. 

I inserted the plugs with a little bit of wood glue to ensure they would stay in place. After the glue had set I used a chisel to cut off most of the plug that would stick out, but this may not have been the best way to do it, since 2 or 3 of the plugs would snap off BELOW the main plain of the slat, so there was a slight indentation for those plugs. I think I chiseled those 2 or 3 plugs perpendicular to the grain but have to find a better, more predictable way to cut the plugs. (Research needed!). I also was not diligent enough to ensure that the grain of the plugs would line up with the grain of the slats for the first couple of plugs, so not all of them lined up nicely. Lesson learned!

I sanded down the plugs nice and flush and coated the slats with 5 layers of Epifanes Rapid coat. I did not use the Epifanes varnish on the slats; Part laziness and part of me thinking the slats will not see much sun anyway so why bother, but the end result does not look half bad, if I say so myself...Which of course, I am doing.


Next up, was to rooter out the slots for the hinges. I did not have the exact location of the hinges from the original benches, but decided to have the hinges be 10 inches from either side. That would have to do. I drew the outline of the hinges on the bench and used my trusty Dremel drill with a rooter bit and cut out the slots freehand.

Next up, will be to attach the hinges to the benches. In the original benches, the hinges were simply screwed in, but that was only possible since there was a slat in the longitudinal direction that would hold the screws. I need to use #10 at least, and you can only get 1.5 inch long versions of those and in my design, that would mean the screws would stick out. While I could simply add a small slat on the other side of the hinges, I decided to use #10 machine screws and bolts to attach the hinges to the benches. I have some of them, but not the 12 I need and I also want to put those locking bolts on there and some teflon washers to ensure I don't damage the wood too much, so back to Home Depot for some more shopping!

1 Comment

Need. More. Tools!

Comment

Need. More. Tools!

I started today to replace some of the pieces I had brought back from my last visit that could not be salvaged, or at least I thought it would be more fun to build them from scratch. Those were the two benches on, port and starboard, respectively and the back for the bench at the stern. The benches were cracked and warped and they seem to be relatively straight forward to rebuild.

Next, I had to decide what material to use for the benches. I had a little book on woodworking and perusing that I felt that Mahogany would be a good choice. Nice furniture is always built from Mahogany and it seemed durable and still easy to work with. I recalled that the Home Depot had some different types of wood so I checked to see if they had any Mahogany...No such luck. They really are not a woodworkers shop, so OFF TO THE INTERWEBS!

A simple google search for "Find wood" got me to the nicely named site: woodfinder.com. I could have guessed there would be a site built for the sole purpose to find wood and I quickly learned that there were three shops around Denver that looked like they had woodworkers wood and some of them also had tools...Since I probably had to get some nice tools with this as well. I decided to check out the three stores.

The first two stores had some decent wood, but it was mostly focused on tools for woodworking but the third store (Frank Paxton) was a store dedicated to wood and exotic woods at that. It seems to mostly cater to the professionals but I found some really nice African Mahagony which I only later learned is not the same as Mahogany or "real" Mahogany. But it looked fine to me so I bought some pieces. One that was almost a foot wide and one that was about 6 inches. It was somewhat thicker than the original benches but I figured that would only make the benches more solid and stable so i went with it. But coming home I realized I had not checked the wood good enough because this:

Why the bloody hell did I not check it at the store!

Why the bloody hell did I not check it at the store!

I forgot to check if they were straight or not! I had already had it cut as well, so no way to return to the store...So, first lesson learned. I can't believe I did not check in the store since I am usually pretty good at that, but I guess finding an actual store that had Mahogany was just pretty exciting. But I had learned about boatbuilding and how they use steam and just water to shape the planks for the hulls so I looked around and found my trusty beer kettle which seemed large enough to steam the planks.

Another use of a mash kettle

But, unfortunately, after an hour of steaming and a day of drying, the warp was just as prominent as before...Warp factor fail!

The benches measure about 44 x 15 inches so I had to find a way to glue the 12 inch and 6 inch pieces together, so it was time to buy some more tools! I had found the Woodcrafters store the more well stocked so I shlepped myself to Denver once more to check out my options. I had done some research and found that a Jointer would be able to create a smooth and straight edge on two pieces so checked out the jointer at the store. $800 dollars later I was the proud owner of a Powermatic Jointer!

The trip home with this massive, massive behemoth is another complete story, but suffice it to say it was a trip! The jointer has a nice and sharp blade and you move the piece of wood from the low (right) side to the high side (left) and it will nicely smooth the edge. The tricky part is to move the wood without stopping or pushing more on one side or the other, since almost invariably the last inch and a half or so always show a distinct dip in the edge. But eventually I figured out how to do it, most of the time, correctly and I was ready for the next step. But not before I bought some more tools!

Glue clamps

To ensure the sides are properly glued together, I bought a set of 5 large glue clamps (Home Depot) and it basically works like a charm. The sides are nice and long and don't damage the wood and they are easily opened and closed. I let this sit for about a day or so and thus I had my first bench (well...sortof).

The warped wood resulted in quite the height difference

The one plank was not the only warped piece of wood and the end result was a bench with quite the height difference. But three hours and three sanding pads later I was able to smooth out the differences and I was ready for some more tool buying!

Nice number 3 Woodriver planer V3

I had drawn the outline of the bench on the merged planks and started to use the planer to shave off lots "krullen" from the straight side. I was even able to put on the curved side of the bench with the planer as well, although a slightly smaller planer would probably worked a little better. (I see another tool buying trip coming on).

Aaaaaaaaaand then it was time for another mistake. The straight side of the benches has a slight angle on them so they fit nicely against the backs on the port and starboard side and without properly checking I started to put the angle on one of them and I realized too late that the two benches were of slightly different sizes and ofcourse I had put the wrong edge on the benches...Sigh...

Next up, I go to California to see how the pieces fit after I realized the mistake.

Comment

The sandman commeth

Comment

The sandman commeth

Total waste of the $33.58

Total waste of the $33.58

Allright...I finally starting actually doing some fixing up as the main page of the blog promises. I started with the small cockpit panels that I took of the boat when I visited her on Jun 13th since those would be easily re-made if I eff something up completely. I had bought Jasco Premium paint & Epoxy remover. It is some nasty chemical stuff that is supposed to allow you to simply slather it on and scrape off the expoxy and/or paint (which I assumed was what was covering the panels. But after two consecutive tries, whatever was covering the panels was not coming off...Time for plan B.

A stock photo of the Ryobi Circular Sander I use

I tried to manually sand the panel but that did not do very much so time for the powertools! I already had a circular sander and a bunch of different pads with "hook-and-loop" (since you can't say Velcro since (TM) ) so I put those to work. Although sanding is better done with the grain, this circular sander was just going to be used to get most of the epoxy (still think it is epoxied) off, and finish it up with the hand sanding blocks. This worked really well.


Here are some before and after pictures:

Obviously a before situation

...and the after shot

I was pleasantly surprised at how well the circular sander worked on these little panels, but it was obvious that the panels had been painted since one of the panels consists of two separate pieces which was not obvious from the original pieces. I also was pleasantly surprised at how nicely the wood cleans up with the sanding. The gray patine completely disappears with only a little sanding something that will be even more obvious and satisfying later. Sanding the little finger holes was straightforward after I found my little round sanding file. The backside had been painted white for some reason; not sure why but they are no longer white. Not sure how I am going to color/paint the panels, but that is something for later.

Flappy sanding discs you stick on a drill

After this successful first session I felt up for something more challenging; the helm. The helm was not in bad shape, but it was mostly rounded edges and did suffer some dings and scuff marks so I had to sand all that smooth. The circular sander had obvious some problems with all these rounded edges so i resorted to the "flappy sanding discs" I picked up from Ace Hardware. I did not actually get the DeWalt versions but there are better pictures for those. I am getting those through Amazon as well now though.

These sanding discs work really well although you have to be a little careful not to sand in one place too long since you will get ruts etc. After the heavy lifting was done, the foamy sanding blocks I had did the rest. First smoothing everything out with 60 grit and then finishing it off with 120 and 220 for a smooth finish. The before and after pics, below, don't do it justice but the help came out nicely as well.

A stock photo of a typical foamy sanding block

Next was an even harder challenge; The hand rails. Those were the worst and almost completely bald at the sea sides. Most of the hand rails were rounded so not much use for the disc sander so I resorted to some limited use of the flappy sanding discs and mostly manual sanding with some nice foam sanding blocks I picked up from Ace Hardware.


I did not have much hope of restoring the hand rails to their former glory since they were almost completely bald and rough and had that gray patine but after only a couple of strokes of the sand blocks, the original wood came back nicely.

I noticed that one of the bases of one of the handrails had cracked a little but a little CA ("SuperGlue") and a couple of clamps and it was all good again. I did see some blackening, which is the first sign of rot and fungus infection but I am pretty sure I got there in time. But something to look out for in the future. The use of the flappy sanding wheel did leave the top of the rail a little "bumpy" and I was not yet able to remove those with the foam blocks but I will get back to that later. And this is what the final product looks like...A nice smooth hand rail with some nice light wood coloring compared to handrail that had not been treated yet. Isn't wood wonderful!

A close up shot of one of the two hand rails after being restored to their former glory (before the varnish etc.)

Feeling really good about how things are progressing, I started on the two panels for the cabin. They were actually in pretty good shape, although the bottom of the panels, that probably saw some water etc. was getting rough. I decided to sand down the complete panels and since this was mostly flat surface the circular sander was perfect for this. The only problem I ran into was sanding down the little grooved bottoms and tops of the two panels, but a fresh flappy panel did the trick nicely. I did notice a few black spots that obviously had some dealings with fungus and I was not able to sand it down completely, but I will just have to keep an eye on things.

There were also two screw holes that did not go all the way through, but since they were exposed to the elements also had started to turn black. I will just fill those holes with liquid wood or wood filler and hope for the best.

Comment

Old $h1t

1 Comment

Old $h1t

I finally got around to dig through the big box of paperwork that came with the boat. It contains a lot of manuals and receipts etc. that the various owners had collected over the years and especially Frank Weis had been quite meticulous in saving manuals and receipts.

But the coolest things I found was some original correspondence between John R. Lashua who had the K-38 in Kotzebue, Alaska and Paul A. Kettenbrug, the original builder of the boat!


Letter from the actual designer/builder who built the K-38 in 1951. This letter is dated 27NOV1973, almost 21 years after launch "somewhere" in 1951.

John Lashua apparently asked from some plans of the K-38 and wanted some more information about the fuel tank, the latter Paul was unfortunately not able to provide. But I also learned a little tidbit about the deck covering, which apparently had been canvas, which, according to Paul, probably needed to be replaced by now (22 years after launch). Kettenburg Marine had started to use fiberglass with hull #22 and he suggested that John Lashua use fiberglass to cover the deck.

I also found an (empty) envelope from the Kettenburg Boat Works (as they were called then) from Mar 13th, 1952 sent to what I assume is the original owner; a Dr. Russel H. Huff In Seattle Washington. I also found a specification list from Apr 16th, 1952 as it was received by the "Seattle Office" so I am guessing that the specs were the original content of the envelope...Pretty cool!

An envelope from the Kettenburg Boat Works sent on 13MAR2015 to the first owner in Seattle Washington which very likely contained the spec sheet, seen below

I also found some plans that were probably sent to John Lashua in 1973 by Paul Kettenburg since he referenced them in his letter. There are several plans for the interior but I suspect that this first plan here (#375 from 1949) is the closest to what the original layout was. That plan shows the two full berths on either side and the head on the port side. It also shows two ice buckets on starboard and a sink and stove on port side. The sink and ice bucket are now on the starboard side while the port side berth is shorter now and a ice bucket and stove are port side now. The previous owner, Frank Weis had created a beautiful stove, icebox and working area on port side. He had not gotten around on addressing the sink and old rusty icebox, on starboard side, so that task now falls to me.

I actually like plan #376 a little better with the berths sticking into the cockpit so I am considering changing the layout at some time...But we will see....


I did not perform a survey when I bought the boat since I am in impulse buyer and I knew she was in decent shape. Going through the old stuff I did find a Survey from 1976 and the findings from the surveyor then.

From the survey I learned that quite a few ribs (7) had been broken or cracked and that those ribs needed to be "sistered" (another rib put beside it to retain the integrity). Indeed those have been sistered so it is obvious this thing had run into some stuff and I suspect ice since it was in Kotzebue, AK for years.


I also found a more recent letter from when Frank Weis bought the K-38 from an woman named Donna in Seattle, Washington. Mickey (Malcom) Warde bought the K-38 from John Lashua in 1991 and put in a new engine and replaced the rigging. In 1998 the mast was replaced  and it seems that the cockpit deck was replaced somewhere in 2001 as well.

Letter from Donna to Frank about the bought he was about to buy in 2001.

So, with all this it is now probably possible to trace back its history:

  1. "Somewhere in 1951" the K-38 with hull #7 is launched by Kettenburg Boat Works, San Diego
  2. 16MAR1952 : Bought by Dr. Russel H. Huff in Seattle, Washington
  3. ?1973 : Bought by John R. Lashua in Katzebue, Alaska
  4. ?1991 : Bought by Malcom (Mickey) Warde in Seattle, Washington
  5. JUN2001 : Bought by Frank Weis in Arboles, Colorado from Donna (Estate holder)
  6. 06MAY2015 : Bought by Thon de Boer, destination "Somewhere in the CA Bay Area"

Here is a map of all the places this K-38 has been.


1 Comment

First Dip

2 Comments

First Dip

I had a chance to go to California to visit some friends of mine and I swung by Stockton to have a look at the ol' girl. I had heard from Patty at Ladd's Marina that they had finished reefing and caulking and painting the underwater ship and that they had put her in the water since the hot season in CA was upon us and it would only dry out more....So you can imagine my surprise to find her in the same place I left her almost a month ago...On blocks safely on terra firma.

No one was around to ask what happened, but when I got on board I could soon figure out what had happened. I saw a significant amount of water in the hull so I figured that they had put her in the water, soon realized she was leaking like a sieve and quickly pulled her out to avoid her sinking! I later learned that was exactly what had happened and so now they are working on plugging the leaks...This is to be expected with a wooden boat so I am not worried.

But I did see quite a lot more cracks and movement of the planks and especially the bow show quite some significant shrinkage...

Ladd's Marina is going to reef and caulk and paint the above-water ship now as well. I also took the opportunity to strip the boat of a few bits and pieces I can work on at home so I took down the benches and the hand rails so I can work on them at home.

On Friday I had met with my good friend John at his cabin in the Anderson Valley area, which he bought after he saw the wisdom of me buying the Grass Valley property. We apparently had agreed to meet at the Ladd's Marina warf on Sunday so I could show him and his step-dad Jim my boat, but in stead of me being at the warf on Sunday, I was doing this:

Baby Mako seems pretty content here...

Baby Mako seems pretty content here...

Suffice it to say that John was not happy that he drove all the way up to Stockton from San Leandro (that's over an hour away! :) but he was graceous enough to leave me a little "house" warming party gift. I had not noticed that my ship already owned a bottle opener and one that looks like it had been installed there in the days of its first launch (1951) but it still has to go.

2 Comments

There and Back Again

2 Comments

There and Back Again

The trip home was as uneventful as the trip there and when I plotted out the route on Google maps I realized i did over 2600 miles (almost 4200 KM!) . I probably would have been better off leaving the truck there and flying back, but what's the fun in that!

Made a full circle in the west

Some perspective of the trip compared to the size of the US

So, now I have to think about where to moor the little beauty after Ladd's Marina is done with the repairs. While it looks like it is possible to get all the way to the Bay Area from Stockton, it's quite a trip and not something you want to do every weekend. I estimate the trip is about 60 miles from Stockton to San Francisco over the waterways. We'll see...

The waterways from Stockton to the bay is mostly rivers and the delta

2 Comments

Dropping her off at the warf

1 Comment

Dropping her off at the warf

I arrived in Stockton at the Ladd's Marina warf and the team immediately starting offloading the boat with their crane.

We found a spot for her to rest and they started offloading the mast as well. All in all it didn't take more than 45 min to get her all setup for the next phase.

Looking around on the warf I came upon this sad sight. I hope someone is restoring this beauty..Looks very much like my Kettenburg and obviously needs a lot of work...MAYBE i should inquire if this thing is for sale...Would be a great "practice" restoration to help me learn how to take care of a wooden boat without having to practice on RareBear :)

The marina at Ladd's Marina is a little rough but there were a couple of boats and in slips and also saw a couple of spots that would be great for RareBear to moor at. It has access to the bay but it would be quite the trip to get to the bay so not sure this would be the permanent place for her, but it's an option and probably a hell of a lot cheaper than in the Bay Area itself.

I sat down with Patty of Ladd's Marina to go over all the stuff I would like to have them work on...Now i'm waiting for the estimate to see how much I am going to have to do myself :)

1 Comment

Where in the world is RareBear

1 Comment

Where in the world is RareBear

The journey has begon! Started out a little scared hauling this 11,000 LBS monster around and with every bump in the road I was convinced it would come crashing down...You never realize how bad some of the American roads can be when you are hauling a massive boat around! But the trip inside the truck was probably way less comfortable than in the boat. The 1ton truck has massive shock absorbers but they are expecting the pickup truck to be filled as well and since it was empty i was rocking and shacking in the truck but the boat was fine.

I wanted to hit Interstate 40 as fast as possible and Mike was so kind to give me a route that would get me there the fastest and it worked like a charm...Thanks MIke! The trip towards I-40 was probably the bumpiest but once on I-40 it was smooth sailing from there... Around Flagstaff I saw a sign for Meteor Crater and thought it was a nice idea to have my boat photographed at a few cool places so I soon found myself on the road to Meteor Crater...Unfortunately, it was closed for another hour so just settled for a pic with some cows near the crater.

RareBear and some cows near Meteor Crater and the weather was starting to look a little ugly

Was a a little tricky to turn around the truck and trailer but soon I found myself back on I-40 and heading further into Northern Arizona. I was running low on gas and found a lonely gas station on famous route 66 and got some really expensive Diesel ($5.24 per gallon!) Not sure why they felt they could get away with that, but being the only gas station for 100 miles around probably had something to do with that :) But I got some nice pics of RareBear amongst the palm trees and the Route 66 sign

And then I finally hit California! But I was still only half way...I hit route 58 and that is when the real bad roads started. Highest income tax in the union and they can''t be bothered fixing the roads. Anyway. Flame off. I soon hit Mojave, the place of Burt Rutan's Scaled Composite and the test site for Spaceship One and Two. Also the site of the famous airplane graveyard there and could not resist making a few pics there.

And then the heavens opened and I was really glad I was bringing a boat since man did we hit some bad weather...Drought my ass! I also was not able to close the cabin hatch completely due to the mast being in the way, but if a boat cannot handle a little rain, it has no business trying to be a boat. Also lucky that the boat is still leaking, so the water could make it out form the bottom. Always look on the bright side of life, tudu...tudu, tudu, tudu. At the turn off from Route 58 to Route 99 there was a massive accident involving a propane truck and lots of other cars, but no fire (or at least dowsed fires) so no explosions etc. but there was a car wedged under the propane tank and I can only imagine the feeling of that driver when he/she was wedging him/herself under the propane tank and waiting for the BOOM! I also counted my blessings that I was not there a little earlier since I could have been part of that since it was obvious this accident happened not half an hour ago, since police was still arriving at the scene. No time for pics and I feel I am getting closer to my goal...STOCKTON!


1 Comment

Prepping for transport

Comment

Prepping for transport

I arrived at the ship storage at Navajo state part at around 9:30 after a couple of errands and Frank was already busy prepping the ship. We hooked up the trailer to the truck and I eased her out of her spot. We moved the trailer to the other side of the warf under the mast hoist. Some bozo had parked their Lake Boat (one of those living room pontoons of which I don't see the fun, but each to its own I guess) close to the hoist so it was tricky to get her positioned but we managed.

Echo under the mast hoist with Mike and Frank

Echo under the mast hoist with Mike and Frank

Frank had asked his buddy Mike to help us and he operated the hoist. The hoist is basically a big rig with a long metal wire connected to a gearbox that is operated with an electric drill. We fashioned a sling around the mast and we hoisted the sling up to the crossbar (I have to learn all these new nautical terms, since I am pretty sure it is not called the crossbar) after which we could put pressure on the mast to have it lift up. It was a little stubborn in the beginning, but after a little wiggle it popped out about two feet and it was free. I did find out later that we probably damaged the crossbar with this procedure, since the starboard side (Hey. I'm learning!) seems to have some loose from the mast so that was the first item for the repair list (and it wouldn't be the last). We hoisted the mast up and when it was free I walked it to the stern (I know that much) while Mike was lowering it. The rest or the prepping went pretty smoothly although we did notice that the backstay connection to the mast was broken, so another item for the repair list.

At about 1 PM we were done and went for lunch which was supposed to be just with Frank, his wife and me, but out of nowhere all of his buddies showed up out of the blue, so before we knew it we were having lunch with the six of us. Frank picked up the tab (hey..he had just sold his boat so he is rolling in it, his buddies said :) and we headed out with the trailer to Mike's shop. We checked the tire pressure and had Frank's colleague Josh check the brakes since we heard some mysterious knocking at one of the brakes, but he convinced me that everything was fine (Did NOT get that in writing). Franks wanted to make sure I had the electric brake system dialed in correctly, so he volunteered Mike to ride with me for a couple of miles to make sure. Frank was really helpful throughout the whole process and I can see he is going to miss having Echo around to tinker with although it sounds he has a couple of other boat options so he will be fine, but I told him he could always come and visit her in the bay...And with that I was on my way to California!

I'm on a BOAT!

Fully strapped down and on my way under a clear blue sky (My case is casting a shadow in the top left corner. Need to replace the case

Fully strapped down and on my way under a clear blue sky (My case is casting a shadow in the top left corner. Need to replace the case

Comment

Moving her from Southern CO to California

1 Comment

Moving her from Southern CO to California

I'll be moving her from Arboles in Southern Colorado to Stockton on this...

But first, I need to get there...Started out today picking up a RAM 3500 1ton truck to haul it out but got stymied by Route 285 being closed THE WHOLE DAY because of an accident with casualties. Had to go the long way around back through Evergreen and passed Copper Mountain. But since I will be driving almost 2500 miles, a few miles detour should not be a big issue...

The RMA3500 I rented to haul out the boat.

Arrived in Pagosa Spring, apparently the home of the deepest hot spring (in the US I am guessing). Checked into a little motel across from the Rif Raf brewpub which I will be visiting soon!

OK...I guess I was wrong but maybe not really. Talked to a grad student of the school of mines in Golden (HEY I just came from there) and he (Stephen) told me that it is probably the deepest hot spring in the world but the powers that be in Pagosa Springs won't let anyone near the place to actually do some science and measure their claim. Oh well...Guess we'll never know.

1 Comment